Restaurant Bar Design: Layout, Dimensions and Back Bar
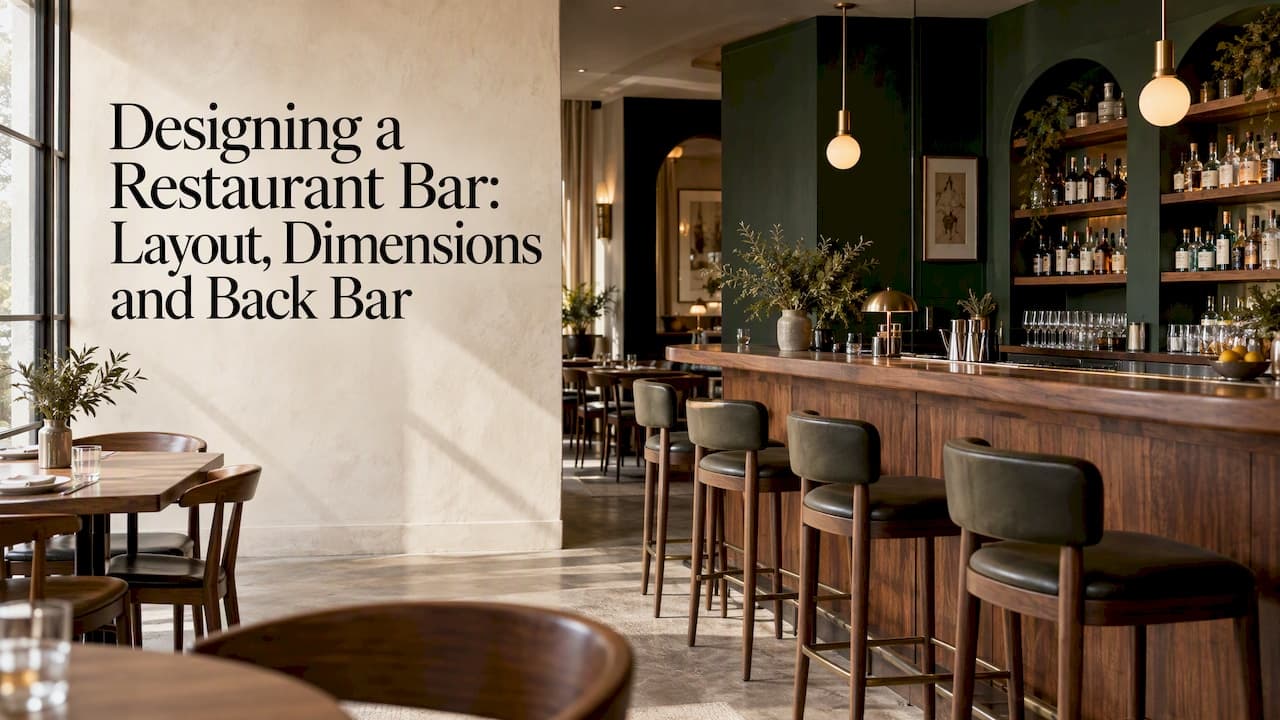
A good restaurant bar is planned from the bartender's hands outward, then dressed to match the room. Start with the drinks you will serve and the steps a bartender takes to make them. Fix the dimensions that make that possible: a 42-inch counter, a 31 to 36-inch work aisle and a back counter at 36 inches. Then choose a layout shape, light the work zone properly and pick materials that survive a busy Friday. Style comes last, and it is far easier when the plan underneath is sound.
This guide is written for owners, operators and developers who are about to brief a designer. It covers layout, the numbers to put in the brief, the back bar, lighting and materials, and what to do when the bar is small.
TL;DR
- Design the work zone first: keep ice, glassware, sinks and liquor within a step or two of the bartender, and keep servers out of that zone.
- Standard starting dimensions: bar counter 42 in high, back counter 36 in, bar top 16 to 20 in wide, bartender aisle 31 to 36 in.
- Straight, L-shaped, U-shaped, horseshoe and galley bars each suit a different room and volume. Rectilinear shapes are usually cheaper and more efficient than curved ones.
- Task lighting over the well, durable materials and a plan for noise matter more to daily service than the feature wall.
- In a small bar, go vertical with storage and keep the equipment list honest.
Table of Contents
- Start with the bar's job in the restaurant
- Choosing a bar layout shape
- Standard bar counter dimensions
- Designing the work zone: efficient bar layout
- Back bar design
- Lighting, materials and acoustics
- Perspective: how we approach restaurant bars
- Designing a small restaurant bar
- Common mistakes we see
- From plan to built bar
- Work with BOOM Project on your bar
- FAQ
- Sources
Start with the bar's job in the restaurant
Before a single line is drawn, answer three questions. What share of revenue should the bar carry? Is it a waiting area, a destination, or a service point that only feeds the dining room? How many drinks will it make in the busiest hour?
A destination cocktail bar needs a long, deep front bar, a generous well and a back bar that shows off product. A service bar that supplies only the dining room can be a tight, hidden station built for speed. Most restaurants need a blend of the two, and the blend decides everything that follows. One practitioner source puts it plainly:[design decisions should start with the guest experience and the bar concept], not with a mood board.
This is also where brand identity enters. The bar is usually the most photographed part of a restaurant, so its materials, lighting and proportions should read as part of the same story as the dining room. The functional brief and the identity brief are written together, not one after the other. If you are unsure how to open that conversation,our note on [how to start designing a space before the brief is set] walks through it.
Choosing a bar layout shape
The common options are straight, L-shaped, U-shaped, horseshoe and galley. The choice should rest on available space, expected customer volume,[design intent and workflow efficiency]. Here is how they behave in practice.
| Layout | Best for | Watch out for |
|---|---|---|
| Straight | Narrow rooms, a single wall, service bars | Limited seating; bartender travels along the full length |
| L-shaped | Corners, bars that divide a lounge from the dining room | The corner can become dead space if not planned |
| U-shaped / horseshoe | Destination bars, high guest interaction, center-of-room placement | Needs floor area; more staff to cover all sides |
| Galley | Tight rooms, back-of-house service bars | Little guest interaction; two people can collide |
A manufacturer's bar design guide notes that [rectilinear bar shapes are often cited as more cost-effective and operationally efficient than custom curved or rounded bars]. That does not ban curves. It means a curve should be a deliberate choice with a reason: a sightline, a flow around a column, a signature silhouette. Budget for it, because curved counters, curved back bars and custom-cut stone add fabrication cost.
Where the bar sits in the room
Placement matters as much as shape. Put the bar where guests see it on entry if it is a draw. Keep it away from the kitchen pass, so server traffic does not cross the bartender's zone. Leave room for guests waiting for a table, otherwise they stand in the aisle that servers need. A bar next to a banquette zone also affects seating comfort and sightlines,which we cover in our guide to [banquette seating dimensions and layouts].
A practical test: draw the three paths on the plan in three colors. Guest to bar stool, server to service well, bartender along the work line. If any two cross, move something.
Standard bar counter dimensions
Here are the numbers that most operators bring to a first meeting. They come from [a restaurant operations guide], and they are starting points, not laws. Your stools, your bartenders and your local code adjust them.
| Element | Typical dimension |
|---|---|
| Bar counter height | 42 in |
| Back counter station height | 36 in |
| Bar top width | 16 to 20 in |
| Bar depth | 20 to 30 in, averaging 25 in |
| Bartender work aisle | 31 to 36 in |
What the numbers mean for the room
Counter height. At 42 inches, the bar sits above table height and works with tall stools. The back counter at 36 inches matches a standard work surface, which is comfortable for prep, equipment and a pass-through of glassware.
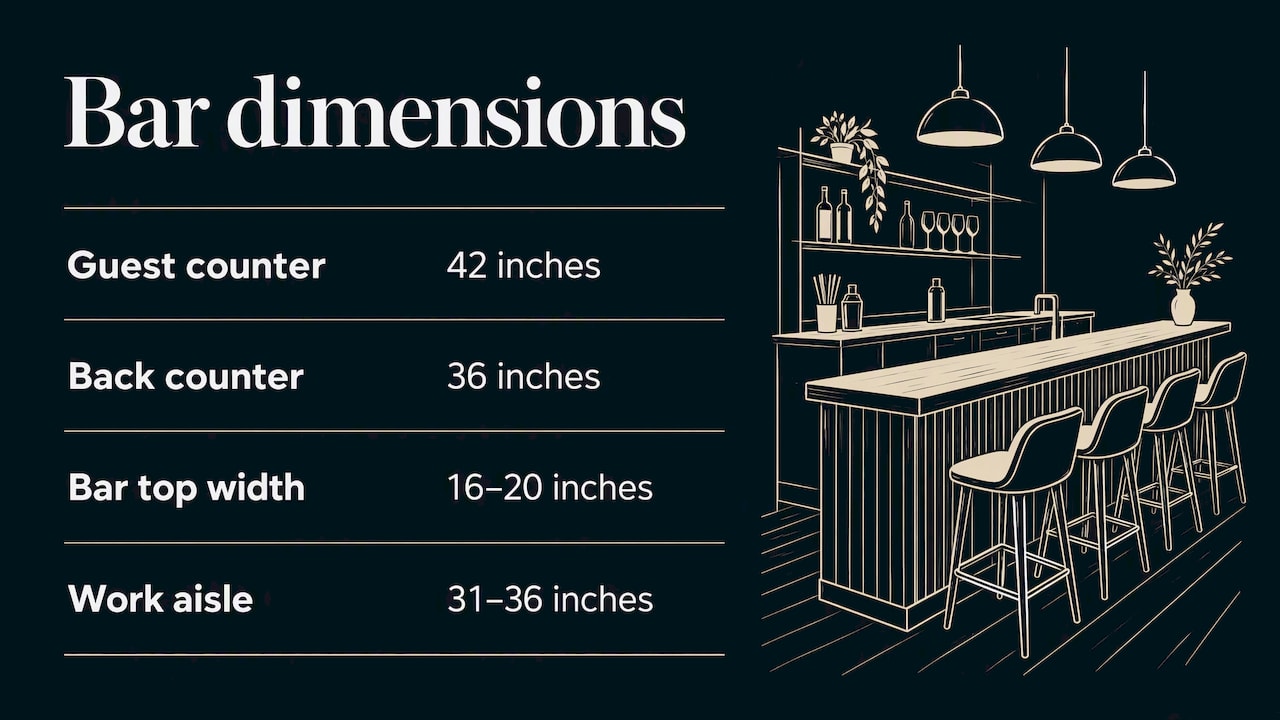
Bar top width. A top of 16 to 20 inches gives a guest room for a drink, a small plate and elbows. Go narrower and food has nowhere to sit. Go much wider and the bartender has to reach across to serve and to clean.
The aisle. A work aisle of 31 to 36 inches lets one bartender turn and reach, and lets a second person squeeze past with some care. If two or three people work the bar at peak, test the aisle with real bodies and a full tray before you build.
Overhang and knee space. Guests need leg room under the counter's front edge, and the overhang depends on the stool style and the counter's structure. We have not found a published figure we would stand behind for all cases, so confirm it with your designer against your stool and counter detail, and check your local code.
Accessibility
A bar that guests cannot reach is a bar that loses revenue and may break the law. In the United States,the ADA guidance for small business says [there must be an accessible route to all dining areas]. It also says that where making a sales or service counter accessible is not readily achievable, a business should provide a folding shelf or a nearby accessible counter. In practice, plan a section of the bar or a nearby high-top alternative at a lower height, with clear approach space. Your architect or an accessibility consultant should confirm the exact requirements for your jurisdiction and your project type. For a wider look at inclusive guest access from the planning stage,this [accessibility checklist for venues] is a handy reference for catching retrofits early.
Our clients operate in several countries, so rules differ. Anything above about the ADA applies to the United States only.
Designing the work zone: efficient bar layout
The work zone is where the real design happens. Three principles carry most of the weight.
1. Minimize steps. Operators should keep sinks, ice,[glassware and liquor within minimal reach]. Trade press describes the target for a cocktail station as frequently used items roughly one to one-and-a-half steps away, with components in the proper order. Anything the bartender touches every drink belongs inside that radius. Anything touched once an hour can sit farther away.
2. Work left to right, clean to dirty. One manufacturer recommends designing bar zones left to right,[from clean to dirty], to follow the bartender's natural workflow. Whether you flip it for a left-handed team is a detail, but the logic holds: a drink's path should not double back on itself.
3. Separate people. Servers need [clear paths that do not cross the bartender's work zones], and POS stations should be reachable without disrupting service. A dedicated service well at the end of the bar, with its own POS and printer, often solves this.
What belongs in the well
A trade article on service bars lists what an efficient well keeps close: tools, glassware, a rinser, frozen-drink equipment, garnishes, refrigeration, POS, printer, trash and prep facilities, close enough to avoid unnecessary steps. The same piece says service bars should favor durable, flexible, plug-and-play components, including ample glassware storage, overhead racks or vertical shelving, and an ice maker sized for the operation.
If you run more than one bar, there is a case for consistency. The 2025 trade piece says identical interior layouts across multiple bars improve systematic operation. Staff who move between stations do not have to relearn where the speed rail sits.
Dishwashing and noise
Undercounter dish machines save space, but the same article warns they may create noise and steam hazards, and its cited designer prefers dishwashing in the back of house. Near a dining room or a quiet cocktail lounge, that advice is worth weighing before you commit.
Floor space allocation
A familiar planning rule is the [60-40 rule]: about 60% of floor space for revenue-generating areas and 40% for operational needs. Treat it as a sanity check, not a target. A bar with a DJ booth, a live act or a heavy equipment load takes more of that operational share,and it helps to know [minimum versus recommended equipment footprints] before you reserve the corner.
Floor and standing comfort
Bartenders stand for hours. Anti-fatigue rubber matting is non-slip, cushioned and easy to sanitize,[and a floor drain makes cleanup easier]. The finish under the mats matters too:we compare options by zone in our guide to [restaurant flooring materials].
Back bar design
The back bar does two jobs at once. It is the bartender's storage and equipment wall, and it is the backdrop every guest looks at all evening. Designing it well means giving both jobs a clear zone.
Work level (counter height). At the 36-inch back counter height noted above, place the equipment that gets used constantly: undercounter refrigeration, ice, the glass rinser if the plan has one, and the most-used bottles within reach. This is the part of the back bar where the one-to-one-and-a-half-step rule decides placement.
Display level (above the counter). Open shelves, mirrors, framed glass and lit niches make the product the decoration. Put the best bottles here, not the speed-pour workhorses. Vertical storage also helps capacity:[wall-mounted shelving can increase storage without expanding floor space].
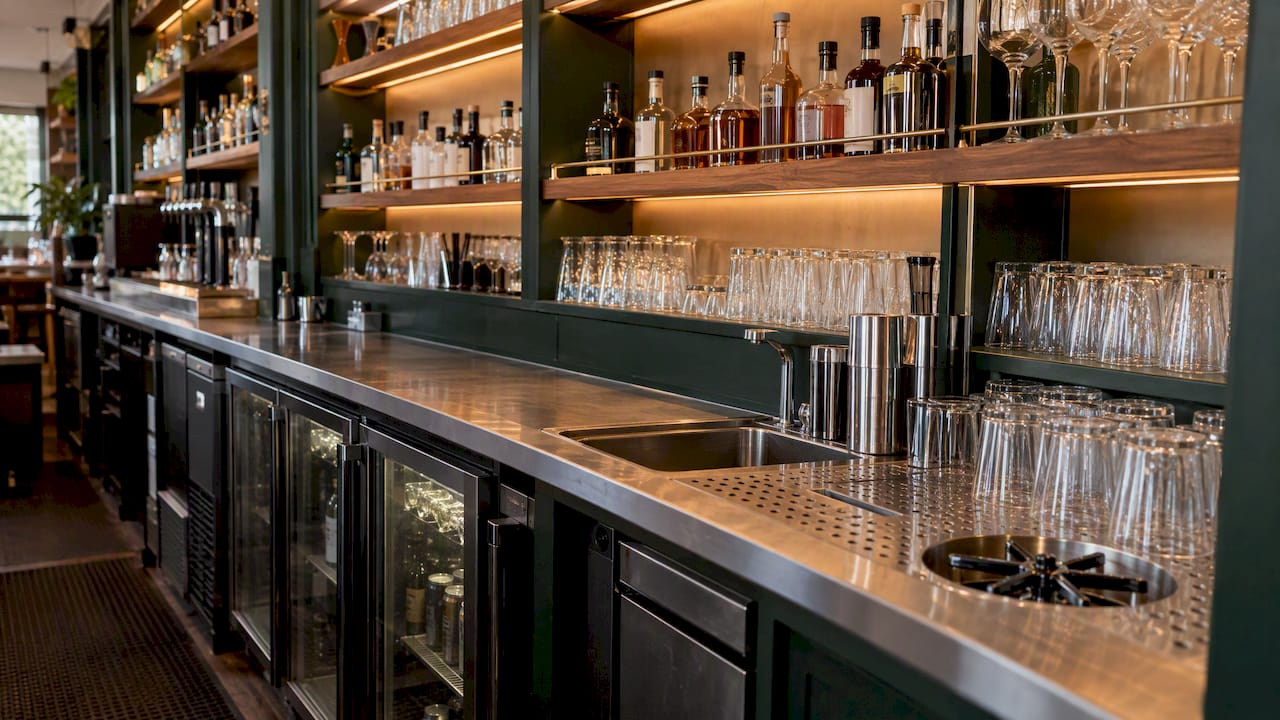
Reserve storage. Back-ups of glassware and spirits live in closed cabinets below, or in a room nearby. Overhead racks and vertical shelving for glassware are a recognized approach in the service bar guidance, and they keep the counter surface free.
Back bar checklist
- Is every bottle the bartender needs for the top ten drinks reachable without a step?
- Can the bartender see labels in the light you have specified?
- Are heavy items stored low and breakable display pieces out of the bump zone?
- Can the person restocking work without crossing the guest-facing bar?
- Does the back bar look good with only 70% of the bottles on it? Real bars are rarely fully stocked.
The last point matters for design. A display that only works when perfectly stocked will look neglected within a month. Build in some negative space, art or lit material so it holds together at any inventory level.
Lighting, materials and acoustics
This is where the bar becomes distinctive, and where function and style meet.
Lighting
The bar needs layers. Ambient light sets mood. Accent light picks out bottles and textures. Task light lets the bartender work. On the last,one guide advises [under-cabinet task lighting over the work area] so bartenders can see what they pour, and notes that low light can lead to grabbing the wrong bottle. Dim the room, not the well. For layers, levels and color temperature across the whole venue,see our guide to [restaurant lighting design].
Materials
The same guide suggests stainless steel for high-volume, modern concepts, wood for gastropubs and traditional bars,[and marble or granite for fine dining and statement bars]. Treat that as a starting vocabulary. The bar top takes spills, ice, citrus and elbows. Choose it for how it ages: some finishes patina well, others simply look worn. Always request a sample and test it with lime juice and red wine before you sign off.
For upholstered bar stools and banquettes next to the bar,cleanability depends on more than rub counts. Our article on [commercial upholstery fabrics] explains what to ask for.
Acoustics and technology
A bar is the loudest place in most restaurants. Hard counters, glass shelving and mirrors reflect sound. Plan absorption in the ceiling, behind the back bar or in upholstered seating, and decide where speakers, screens, POS cabling and power sit before the finishes go on. Retrofitting conduit into a finished bar top is expensive and ugly.
A reminder from the 2025 trade piece: appearance should follow the operation and product mix, and equipment trade-offs are acceptable only when service efficiency is preserved. A beautiful bar that slows service is a failed bar.
Perspective: how we approach restaurant bars
We design interiors for restaurants, hotels and large commercial spaces, and the bar is where most of our early conversations get tense. Owners often arrive with a picture of a finished bar they love. We ask about the second hour of a Saturday night instead.
Our view is simple. A bar is a piece of equipment that happens to be on display. The best ones we have seen look effortless because someone solved the workflow before drawing the facade. That is why we work from concept through drawings, materials and site follow-up as one process: the person who understands why the well is 34 inches wide should also be the person checking the joinery on site.
We also resist copying a trendy shape. The right bar for a Chișinău grill restaurant is not the right bar for a whiskey bar in Odessa or a beach club. You can see how those briefs turn out in our projects,such as the [Nipper Bar],the [York Whiskey Bar],the [Beer Garden grill restaurant]and the [beach club project].
— slava
Designing a small restaurant bar
Small does not mean basic. It means every inch carries a job.
- Go vertical. Wall-mounted shelving and overhead racks add capacity without taking floor area,as the [floor plan guidance] notes.
- Cut the equipment list. Work from the menu. If only a handful of drinks need a blender or a frozen-drink machine, consider whether they belong at this bar at all.
- Choose a straight or galley form. These shapes give the most work length for the least footprint, and rectilinear forms tend to cost less.
- Move noise and heat away. Dishwashing in back of house frees space and avoids steam at the guest edge, according to the designer cited in the 2025 trade article.
- Spend on one feature. A lit back bar, a distinctive counter edge or one unusual material gives character without crowding a small room.
- Let the bar do double duty. In a compact venue, the bar can serve as the host stand, the coffee station or the take-away counter, as long as the paths do not collide.
If the bar extends to a terrace,the same discipline applies outdoors. Our guide on [outdoor dining design] covers layout, comfort and code.
Common mistakes we see
- Designing the front before the work zone. The facade is beautiful, the bartender is trapped.
- Ignoring the service well. Servers queue in front of guests because there is no place to pick up drinks.
- Too little ice and glass storage. The bar runs out mid-service because capacity was sized to the drawing, not the rush.
- Skipping drains and floor planning. Cleanup becomes a daily fight.
- Under-lit wells. Gorgeous mood, wrong bottle.
- No accessible section. A late fix costs far more than an early plan.
- Late technology decisions. Power, data and speakers are added after the stone is cut.
From plan to built bar
A bar is built from drawings, and drawings fail when they are vague. The package should include plans and elevations of both front and back bar, section details through the counter, equipment schedules with utility connections,and finish specifications. Our [construction drawings guide] explains how detailed documentation reduces rework on site.
Work with BOOM Project on your bar
We handle hospitality bars from concept to opening. The scope can start with [preliminary design],move to [3D visualization] so you can judge sightlines and lighting before you build,and continue through [execution drawings], furniture,[materials and accessories]and [site and supplier follow-up].
If you are planning a new bar or reworking an existing one, tell us the concept,the room and your target volume. See the full list on our [services page]and get in touch through [boom-project.com].
FAQ
What is the standard bar counter height?
The usual figure is 42 inches for the guest-facing counter, and 36 inches for the back counter station,[according to one operations guide]. Adjust for your stools and for an accessible section so guests of different needs can use the bar.
How deep and wide should a bar be?
The bar top is commonly 16 to 20 inches wide, while overall bar depth runs 20 to 30 inches, averaging about 25 inches,[per the same guide]. Deeper bars give more room for equipment on the bartender's side but eat floor space.
How wide should the bartender's aisle be?
About 31 to 36 inches is the range given in the [operations guide]. If two or more people work behind the bar at peak times, test the width with a mock-up before construction.
Which bar layout is the most efficient?
Straight and other rectilinear layouts are often cited as [more cost-effective and efficient than curved ones]. The best fit still depends on room shape, volume and how much guest interaction you want.
Does a restaurant bar need to be accessible?
In the United States, the ADA requires an accessible route to dining areas,and the [small business primer] describes alternatives such as a folding shelf or a nearby accessible counter when altering a counter is not readily achievable. Ask your architect to confirm what applies to your building and location.
Sources
- [Restaurant Bar Layout and Interior Design Ideas]
- Bar Layout Planning:[Expert Tips]
- Bar Design Guide,[2023]
- [Bar Floor Plan Design] - Restaurant Bar Design Guide: Layout, Equipment,[and Cost]
- [Interior Designs and Layouts for Bars and Pubs] - ADA Update:[A Primer for Small Business]