Open Kitchen Restaurant Design: Layout, Noise and Finish
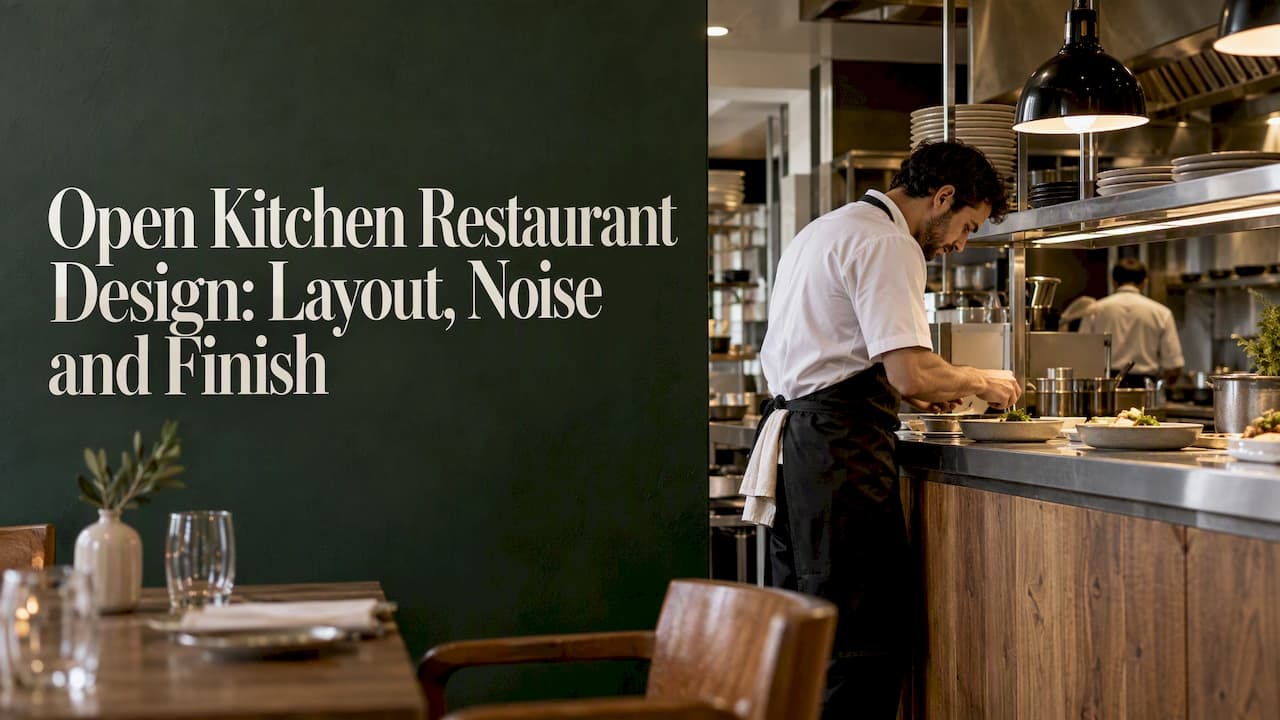
A good open kitchen restaurant design treats the cooking line as part of the dining room. It is planned for sightlines, sound, smell and finish as carefully as it is planned for workflow. Get that right and the kitchen becomes the best piece of theater you own. Get it wrong and guests sit next to a loud, hot, greasy workplace. This guide covers how to choose an open kitchen layout, what to settle with your engineers early, and where the budget really goes.
TL;DR
- "Open kitchen" covers a wide range, from a pass-through window to a full cooking stage. Choose the degree of exposure before you draw anything.
- Noise is the main risk. [A kitchen adds roughly 65–75 dBA of continuous noise] to the dining room, so the dining room needs more absorption than a closed-kitchen plan. - Ventilation and fire code decide where cooking equipment can sit. Bring the mechanical engineer in at concept stage, not after the layout is approved.
- Everything guests can see is furniture: counters, flues, ticket rails and under-counter fridges all need a considered finish.
- Your local health department usually reviews plans before construction, so the layout has to pass inspection as well as look good.
Table of Contents
- What "open kitchen" actually means
- Decide why you want an open kitchen
- Choosing an open kitchen layout
- Ventilation and code come first
- Sound: the problem most open kitchens underestimate
- Make the kitchen look designed
- Costs and trade-offs to plan for
- Our perspective
- How we can help
- A step-by-step planning sequence
- FAQ
- Sources
What "open kitchen" actually means
The term is imprecise. As [rd+d points out], it can mean a view into the back of house through a large counter-height window, or it can mean cooking stations placed in the middle of the dining room. Those are very different projects, with different costs and different risks.
It helps to think in four levels of exposure:
| Level | What guests see | Typical use | Main design challenge |
|---|---|---|---|
| Window or pass-through | A framed view of the line or the pass | Casual restaurants, cafes, hotel all-day dining | Keeping the frame refined, controlling light and glare |
| Partial open, one wall | Full line behind a counter or pass | Bistros, neighborhood restaurants | Separating hot line from seated guests |
| Chef's counter | Guests seated directly at the cooking station | Tasting menus, sushi, small formats | Smoke, splatter, staff comfort, ergonomics |
| Full island or central stage | Cooking at the center of the room | Flagship restaurants, hotel signature venues | Ventilation overhead, acoustics, finish quality everywhere |
Most restaurants succeed at the first two levels. The last two ask more of the building, the budget and the team.
Decide why you want an open kitchen
Operators often choose an open kitchen as a default. It is better to pick it for a reason, because the reason shapes the design.
Trust and transparency. The classic argument is "see how clean we are." It is worth testing. [A 2019 study from Sejong University] found that customers often read an open kitchen as a signal of noise and smell, not as proof of hygiene. If trust is your goal, the kitchen has to look disciplined as well as be visible.
Entertainment. [Habitas describes] how the open kitchen has grown from a transparency statement into a sophisticated design feature. If the cooking is the show (live fire, handmade pasta, a raw bar), put that station in the sightline and keep the dull work out of it.
Atmosphere and energy. A visible line adds light, movement and sound that make a room feel alive. This works best when the menu is built around it.
Space efficiency. Sometimes there is no room for a separate back of house. That is a valid reason, but it makes ventilation and acoustics harder, not easier.
Be honest about your team too. Not every cook is comfortable being watched all night,and a service that looks calm from the dining room needs hiring and training to match. [Operator guidance from Toast] also flags staff performance pressure alongside noise, odors and higher build-out costs.
Choosing an open kitchen layout
Layout is where operations and design meet. The kitchen has to work first, because a pretty line that slows tickets will be rebuilt.
Start from the menu, not the shape
List the stations the menu needs: grill, sauté, fry, cold, pastry, dish. Then decide which can be seen and which must hide. A common split is to show grill, sauté, pasta and plating, and keep fryers, dish and heavy prep out of view. Fryers and dishwashing are the biggest sources of grease, steam and noise, so they usually belong behind a wall.
Common configurations
- Linear line behind a pass. Cooks work in a row facing a counter. It is the easiest to ventilate under a single hood and the easiest to screen with a counter or glass.
- Island or U-shape. Equipment and workstations are arranged around a central point,a pattern described in [a guide to commercial open kitchens]. It is dramatic but needs more overhead ventilation and a finished ceiling treatment that is good from every angle.
- Chef's counter. Seats face one station. Plan for ergonomics on both sides of the counter: cook reach, guest legroom, and a splash zone you can actually clean.
- Hybrid. A small show kitchen at the front with a full production kitchen behind. In hotels and larger venues this is often the sensible compromise: the guest sees the theater, while the volume of work happens out of sight.
Plan the pass as the stage edge
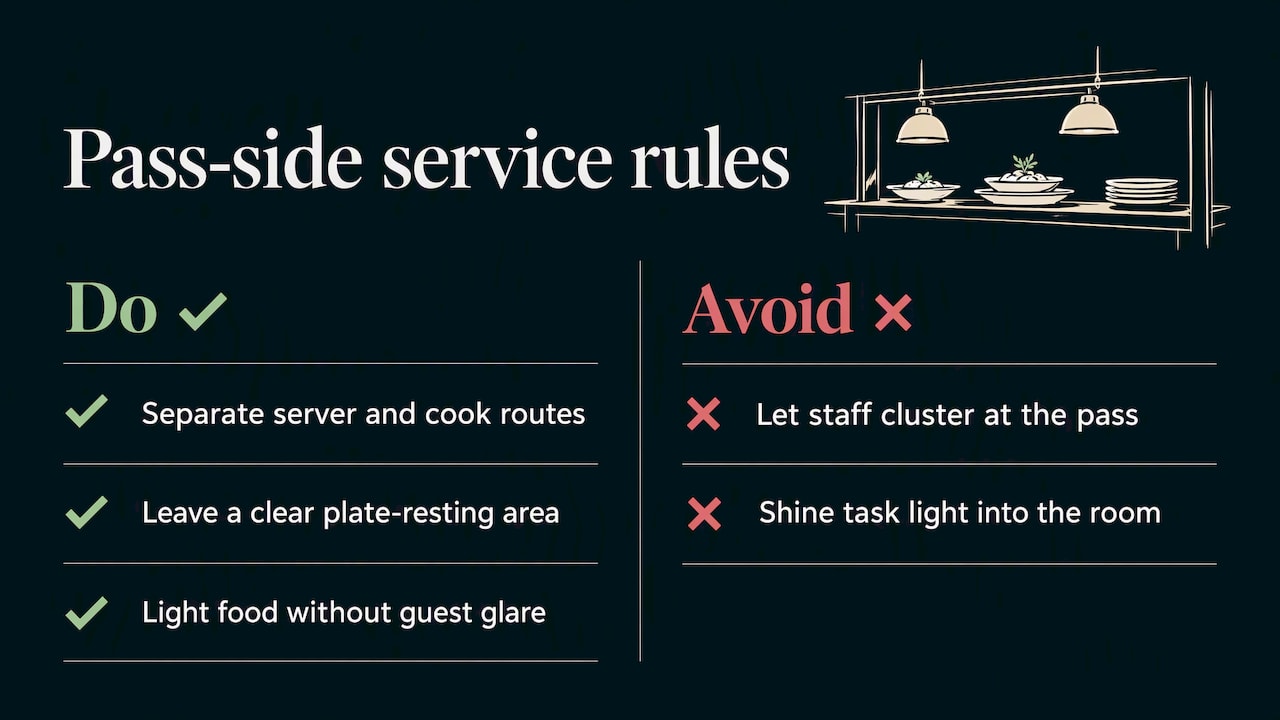
The pass is where plates go from kitchen to server, and it is the most visible edge of the whole system. Keep servers' routes away from cooks' routes, leave a clear place for plates to rest, and make sure the lighting on the food is good without glaring into guests' eyes. Think about where servers wait. A cluster of staff at the pass can ruin a dining room's flow.
Sightlines and seating
Not every table should face the line. Offer a mix: a few seats with a direct view for guests who want it, and quieter tables angled away for those who don't. Test the plan from a seated eye height of about 4 feet, not from a standing plan view. Heat and noise are worst at the tables nearest the line, so use those seats deliberately (a counter for regulars, for example) rather than filling them with whoever arrives.
Ventilation and code come first
An open kitchen puts cooking next to guests, so the air has to be handled before anything else. This is the most common reason layouts get redrawn late.
In the US, commercial cooking that produces grease-laden vapors, such as fryers, broilers and woks, generally requires a Type I hood under NFPA 96 (2024 edition)[]. That standard also sets clearance from combustible materials, usually 18 inches unless the product is listed for less, and requires exhaust through liquid-tight, non-combustible shafts. In practice this affects how you can wrap a hood in wood or decorative cladding. Local adoption varies, so confirm with your jurisdiction and your mechanical engineer before you commit to a finish.
Questions to answer at concept stage:
- Where does the exhaust shaft run, and does it cut through a dining space or a floor above?
- Is there enough make-up air so the dining room is not pulled into negative pressure, which makes doors hard to open and draws odors toward guests?
- Which equipment is hood-required and which is not? A ventless or low-heat station can sometimes be placed more freely, subject to local approval.
- Can the flue and hood be dressed as a design element without breaching clearances?
For a deeper look at the engineering side,see our note on [restaurant ventilation design].
Health review matters as well. Many cities require plans to be approved before construction. For example,[Sioux Falls requires layout plans to be submitted to its health department] before new construction or a major renovation, and no license is issued without approved floor plans. Your city will have its own process. Ask early, because visible hand sinks, equipment spacing and food protection from guests are all easier to solve on paper.
Sound: the problem most open kitchens underestimate
Noise is where open kitchens most often fail. Acoustic specialists at AcousPlan list [ignoring the open kitchen] as a classic mistake: extraction fans, dishwashers, prep and staff communication together add a continuous 65–75 dBA to the dining room. The same source estimates roughly 30% more acoustic absorption in the surrounding dining space than a closed-kitchen layout of the same size would need.
The stakes are real. [Habitas reports] that noise is the number one diner complaint, and that strong acoustic design can improve comfort by 5–10 decibels and lift satisfaction by over 25%. Treat those as industry figures, not a guarantee for your room.
A practical acoustic plan
- Balance hard and soft. Habitas advises adding a soft, absorbent surface for each hard, reflective one, such as upholstered banquettes or fabric baffles against concrete and glass.
- Work the ceiling. It is the largest uninterrupted surface in most restaurants, and it is where absorption is least visible.
- Move the noisy gear. Put dishwashing and fan-heavy equipment as far from the seating as the plan allows, and ask the engineer about fan noise and duct velocity.
- Use upholstery honestly. Banquettes and chairs absorb sound,but they also take the abuse. See our notes on [commercial upholstery fabrics] for what to test for.
- Ask for documentation. AcousPlan advises requesting the ISO 354 test certificate and NRC values of any acoustic product instead of trusting marketing claims.
Flooring also affects sound and safety near the line, since wet,greasy zones need different materials from the dining room. We cover this in [restaurant flooring options by zone].
Make the kitchen look designed
Guests will see everything, so everything needs a finish decision. The most common error is leaving the kitchen to the equipment supplier and ending up with a commissary look in the middle of a dining room.
According to [rd+d's design coverage], designers often confuse industrial stainless steel with aesthetic quality. Their suggested alternatives include:
- Chef counters in quartz, granite or man-made stone instead of stainless steel.
- Flues hidden behind brass or copper facades, subject to the clearance rules above.
- Under-counter refrigeration in place of tall reach-in units that wall off the view.
- Ticket rails in premium finishes rather than standard aluminum, because they sit in the sightline.
To these we would add lighting. Warm, controlled light on the food and the cook, and lower light on the guests' side of the pass, makes a line look intentional. Avoid a harsh task light that shines into the room. Then think about the end of the night: surfaces that look good at 6 p.m. need to survive a full service and still be cleanable, so specify with the cleaning crew in mind.
Costs and trade-offs to plan for
An open kitchen tends to cost more than a hidden one, because of better finishes,more demanding ventilation and more acoustic treatment. [OpenTable's restaurant design guidance] notes that the kitchen is the most expensive part of a new restaurant's buildout and where space and money are most often wasted through poor size, flow and equipment placement. In an open plan, those mistakes are both expensive and visible.
A short checklist of trade-offs:
| Benefit | Cost to plan for |
|---|---|
| Atmosphere and visible craft | Finish budget for equipment, counters and flues |
| Perceived transparency | Strict housekeeping and staff presentation |
| Efficient use of space | Higher ventilation and make-up air demand |
| Energy in the room | Added acoustic treatment in the dining area |
| Guest engagement at the counter | Seat comfort, splash control, and heat management |
None of these is a reason to avoid an open kitchen. They are reasons to put money in the right places and to settle them before you commit to a lease or a concept.
Our perspective
We design restaurants, hotels and large commercial spaces, and we see the same pattern in open kitchen projects. The decision is usually made as a style choice, then the operational reality arrives: the hood is in the wrong place, the fan is loud, the stainless steel looks like a canteen. The fix is sequence. We start with the brand and the guest experience, work out how much of the cooking belongs on stage, and then bring ventilation, acoustics and the kitchen layout into the same drawing, not three separate ones.
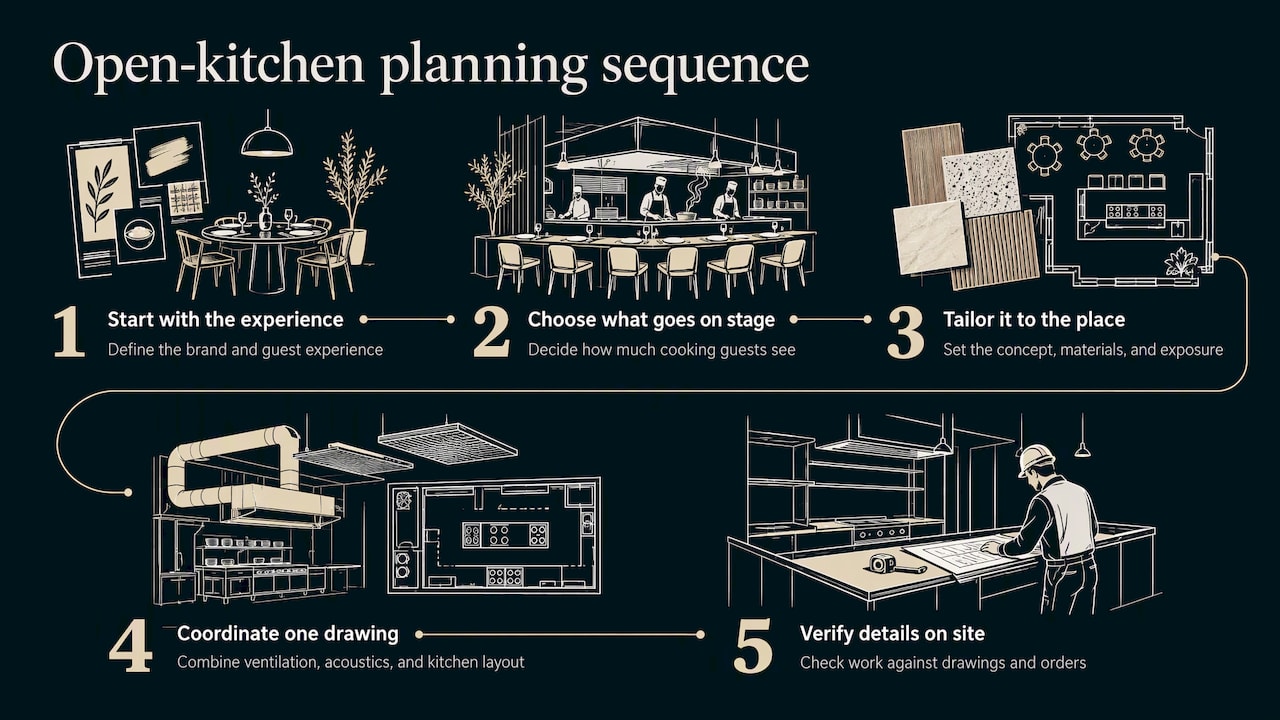
We also think the open kitchen should be specific to the place. A line that works in a chef-led dining room would be wrong for a hotel breakfast, and a theatrical island that suits a flagship would overwhelm a neighborhood cafe. That is why we don't reuse templates. Each space needs its own concept, its own material palette and its own level of exposure, and the kitchen is part of that conversation from the first sketch.
The last point is follow-through. Open kitchens are unforgiving on site: a flue that comes out 4 inches off, a counter that arrives in the wrong stone, a ticket rail that was substituted. Someone has to check the details against the drawings and the supplier orders.
— slava
How we can help
If you are planning an open kitchen in a restaurant, hotel or commercial development,we can take it from first idea to site. We start with [preliminary design] to set the concept and the layout,show you the result in [3D interior visualization] so you can judge sightlines and finishes before building,and prepare [execution drawings] your contractors and engineers can price and build from. We also select furniture,[materials and accessories]and provide [site and supplier follow-up]. You can see how we approach hospitality spaces in our [portfolio], including a restaurant in Vienna,or [get in touch through the services page].
A step-by-step planning sequence
- Define the role of the kitchen. Is it theater, a trust signal, or a space-saving decision? Write one sentence about it and test every later choice against it.
- List stations and sort them. Decide which stations are visible, which are hidden, and which must be hidden for noise, grease or steam.
- Get engineering input early. Ask about hood type, shaft route, make-up air and fire clearances while the layout can still change.
- Check the health review path. Find out how your city reviews plans and what it expects to see, such as hand sinks and equipment spacing.
- Set an acoustic target. Choose absorption in the ceiling, walls and seating, and ask for test data on every product.
- Design the finishes. Counters, flue cladding, ticket rails, refrigeration and lighting, in the same palette as the dining room.
- Visualize it. Check views from seated eye level, including the worst table in the room.
- Control the build. Review shop drawings and samples before fabrication, and visit site at the points where details get changed.
FAQ
Is an open kitchen worth it for a small restaurant?
Often yes, at the pass-through or one-wall level. A small kitchen on view can make a compact room feel bigger and livelier, and it avoids spending on a separate wall and door. The caveat is that small rooms have the least space to absorb noise and smell, so ventilation and acoustic planning matter even more.
How do you keep odors and smoke out of the dining room?
The main tools are a properly sized Type I hood where grease-laden cooking occurs, adequate make-up air, and keeping the heaviest grease sources such as fryers away from the open part. Hood and exhaust requirements follow NFPA 96 and local code, so your mechanical engineer and local authority have the final say.
How loud will an open kitchen be?
Acoustic specialists estimate that an open kitchen adds about 65–75 dBA of continuous noise to the dining room. The best response is more absorption in the ceiling, walls and seating, and moving fan-heavy equipment and dishwashing away from guests. Measured product data, such as NRC values, should guide material choices.
Does an open kitchen make guests trust the restaurant more?
Not automatically. One 2019 study found customers often read open kitchens as a signal of noise and smell, not as proof of hygiene. The kitchen has to be clean, orderly and well-finished to earn trust, and staff presentation matters as much as the architecture.
What should I decide first: the layout or the look?
Decide the role of the kitchen first, then layout, ventilation and acoustics together, and only then finishes. If the look is chosen first, you risk a design that fire clearances, hood placement or noise will force you to change.
Sources
- rd+d: Form + Function:[Open Kitchens in Restaurant Design]
- AcousPlan:[Restaurant Acoustic Design]
- Habitas:[Restaurant Interior Design Trends 2026]
- NFPA 96 (2024):[Ventilation Control and Fire Protection of Commercial Cooking Operations]
- Sejong University: Can signaling impact customer satisfaction,[open versus closed kitchen restaurants]
- Toast: Open Kitchens in Restaurants: Pros, Cons,[and Best Practices]
- GoFoodservice:[How to Design a Commercial Kitchen]
- OpenTable:[How to design a successful new restaurant]
- Sioux Falls Health Department:[Food Service Establishment Guidelines]