Restaurant Layout Planning: Zones, Spacing and Seating
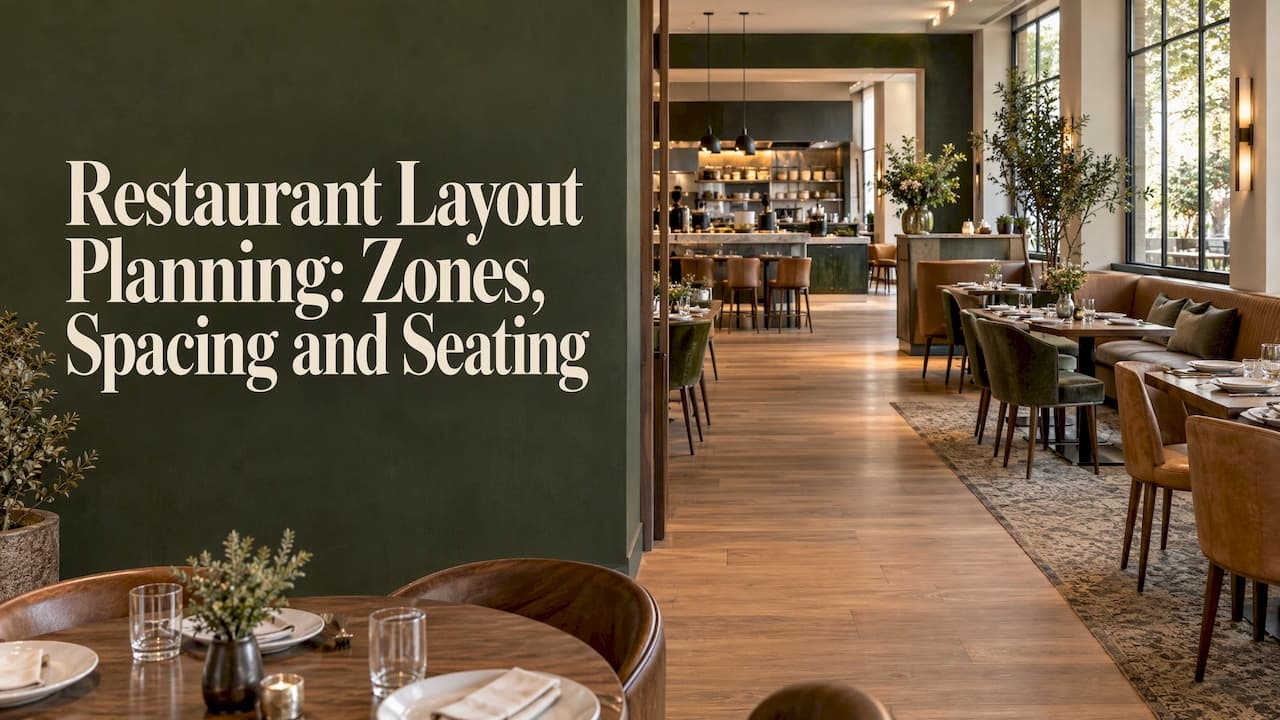
A good restaurant layout starts with the flow of people, not the furniture. Decide where guests arrive, wait, sit and leave, then where food, drinks and dishes travel, and only then fit tables into what is left. Get that order right and the plan seats more guests, lets staff move without collisions and gives the room a character guests remember. Our studio designs restaurant, hotel and commercial interiors, and we plan the layout together with the concept, so the floor plan and the look of the space are never solved separately.
This guide is written for operators, hotel owners and developers who are about to commission or review a plan. It covers the zones every plan needs, how to split the area, the spacing numbers that matter, how to choose seating, and how to make a small room work.
TL;DR
- Split the plan into zones in the order guests experience them: arrival, waiting, dining, service, back of house.
- A common starting rule gives about 60% of the area to dining and 40% to kitchen and storage. Treat it as a first draft, not a verdict.
- Main aisles in the US must be at least 36 inches wide under the ADA; full-service rooms usually plan wider.
- Mix two-tops, four-tops and banquettes, and choose tables that can be pushed together for groups.
- In a small room, every inch should do two jobs: banquettes, mirrors and movable pieces matter more than extra tables.
Table of Contents
- What a restaurant floor plan has to include
- Splitting the area: the 60/40 starting point
- Circulation: keep paths clear and separate
- Table spacing and aisle widths
- Seating types and how to mix them
- Small restaurant layouts
- From plan to built room
- Our perspective
- How we can help with your layout
- FAQ
- Sources
What a restaurant floor plan has to include
A floor plan is a scaled drawing of the space that shows fixed elements such as walls, doors, outlets, water heaters and furnaces, so you know what can and cannot move ([Lightspeed]). On top of that fixed shell, the plan places the working zones:
- entrance and waiting area
- dining room
- bar
- service stations
- cashier or payment point
- restrooms
- kitchen and storage
The most effective layouts do not treat the dining room as one open field. They build a hierarchy of zones for arrival, waiting, dining and service ([FoH Furniture]). Guests then read the room at a glance: where to stand, where they will sit, where the bar energy is.
Front and back of house should meet at a few well-placed points, mainly the kitchen pass and the service stations ([Labamu]). Every extra connection between the two is another door, another collision and another noise leak.
Where each zone goes
Start from the entrance and the light. Some design firms place back-of-house areas far from natural light and bring the bar and dining room as close to windows as possible ([rd+d]). The logic is simple: you pay for the room with the guests' time, so give them the best daylight and views, and put prep and storage where nobody will miss the windows.
Restrooms are the zone most often left to the end. Placing them near the entrance lets guests use them while waiting or on the way out without crossing the main dining area ([Clover]). Plumbing usually fixes their position early, so decide it at the start. If you run events or large parties,it also helps to know how [restroom capacity scales with guest numbers] before you lock the plan.
The bar is both a service point and a piece of scenery. How deep it is,where the back bar sits and how bartenders reach the pass changes the whole front of the room; we cover that in our guide to [restaurant bar design].
Splitting the area: the 60/40 starting point
A widely used guideline gives about 60% of the total area to dining and 40% to the kitchen and storage ([Labamu]). Seating suppliers publish the same rule with a worked example: a 2,800 square foot space becomes 1,680 square feet of dining and 1,120 of kitchen ([Vitro Seating]). The same source suggests roughly 12 square feet per person as a good average for restaurants with a general menu, and as little as 10 square feet per person for banquet seating.
Here is how to use those numbers on a real project:
- Measure the usable area, not the lease area. Subtract columns, stairs and fixed utilities.
- Apply 60/40 to see roughly what you have to work with.
- Divide the dining area by your target square feet per guest to get a seat count.
- Check that count against the kitchen. A menu that needs a long cook line and a lot of cold storage will push the split toward the back of house, and fewer seats is the honest result.
The ratio shifts with the concept. A restaurant with a show kitchen,a large bar or a lounge area spends its square footage differently. Our piece on [open kitchen restaurant design] shows how a visible kitchen changes layout, noise and finishes.
Circulation: keep paths clear and separate
Smooth circulation means guest, server and kitchen-runner paths stay clear and, where possible, separate. Service stations sit close to the tables they support, and the kitchen pass has a direct route into the dining room ([Labamu]).
A few checks catch most problems on paper:
- Draw the three routes. Trace a guest from door to table to restroom to exit, a server from pass to table to dish return, and a bartender from bar to the farthest table. If any two lines cross more than once, move something.
- Keep the dish return out of sight. Place it where servers can reach it without walking through the waiting area.
- Give the door room. A waiting zone that spills into the main aisle makes the whole room feel crowded, even with empty tables.
- Plan service stations by diners served. One supplier guideline suggests one small station of 6 to 10 square feet per 20 diners, and one large central station of 25 to 40 square feet per 60 diners ([Vitro Seating]).
Table spacing and aisle widths
Spacing is where capacity and comfort trade against each other. In the US, accessible routes matter first: main traffic aisles must be at least 36 inches wide to comply with the 2010 ADA Standards, Section 403.5.1 ([Superior Seating]). Check local building and fire codes as well, since they set their own egress rules; your architect or local plan reviewer confirms what applies to your address.
The same specification guide gives practical clearances between tables:
| Configuration | Minimum | Recommended |
|---|---|---|
| Square tables, chair back to chair back | 42 in | 60 in |
| Round tables, edge to edge | 54 in | 60 in or more |
| Diagonal tables, corner to corner | 24 in | 30 in |
Source:[Superior Seating]. The 42-inch minimum leaves room for a chair push-out only; 60 inches adds the service clearance full-service rooms need.
If you work in metric, one hospitality supplier recommends at least 900 mm for service corridors and at least 400 mm between table edges off those aisles ([Harrows]). That is in line with the inch figures above.
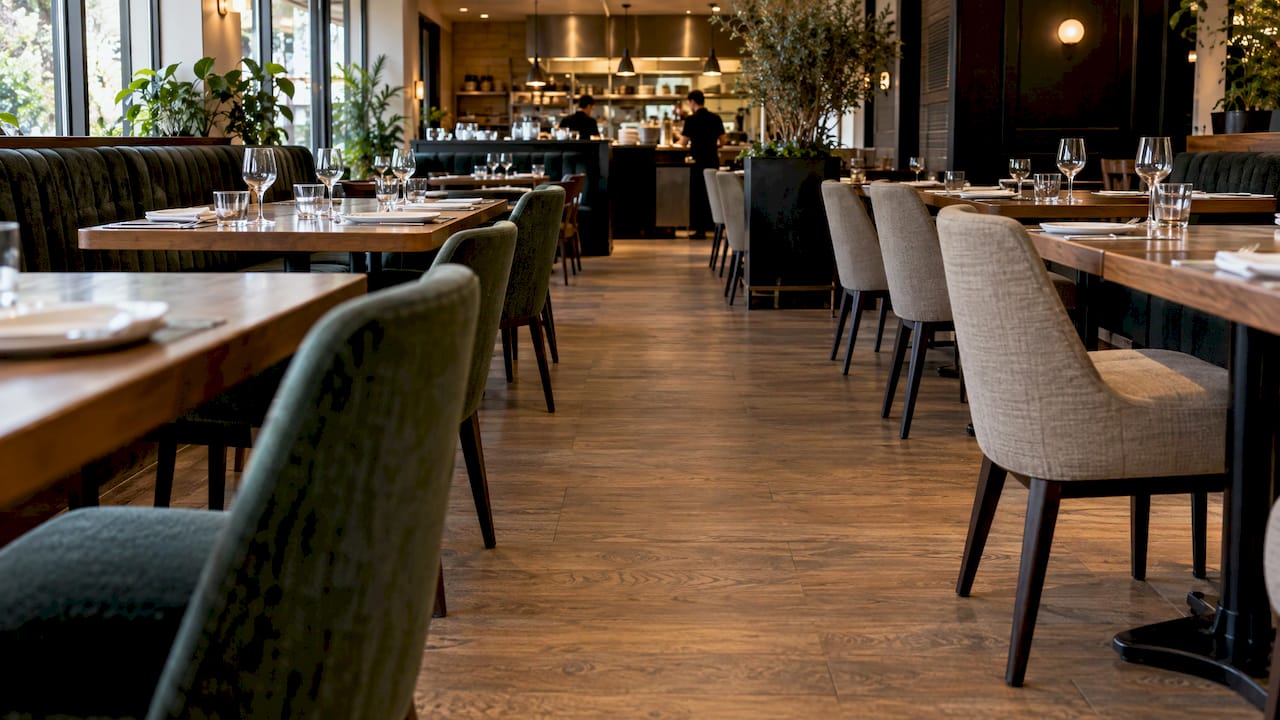
A worked example
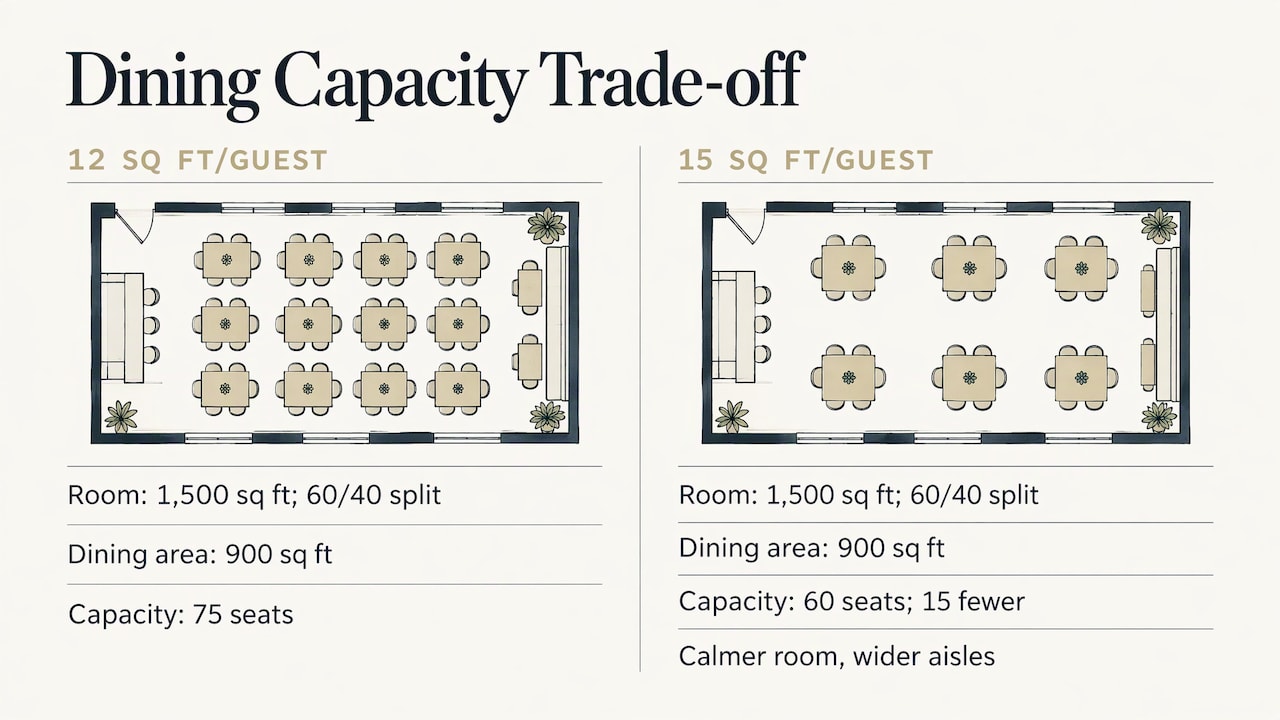
Take a 1,500 square foot room with a 60/40 split: 900 square feet of dining. At 12 square feet per guest, that is 75 seats. If your concept is a slow, long-lunch restaurant, you might plan 15 square feet per guest and land at 60 seats. The 15 seats you give up buy wider aisles, larger tables and a calmer room. Whether that is the right trade depends on average check and turn time, which is a business decision the plan must reflect, not hide.
Seating types and how to mix them
Seating decides how many guests fit, how long they stay and how the room feels.
- Two-tops are the most flexible unit. Square or rectangular tables of a common dimension can be pushed together for larger groups ([rd+d]).
- Four-tops anchor the room and handle families and business lunches.
- Banquettes use wall length efficiently, and convertible banquettes can be altered to fit tables from two to ten guests ([rd+d]).
- Counter and bar seating suits solo diners and fast turns, and a different table height creates a visual zone inside the same room. The supplier guide above lists standard dining tables at 28 to 30 inches, counter height at 36 inches and bar height at 40 to 42 inches.
- Round tables help flow in tight spots but need more edge-to-edge clearance than squares.
A reliable mix is a majority of two-tops and four-tops, a run of banquettes along the longest wall, and one or two flexible group tables. If groups matter to your business,plan for [modular tables and movable partitions for different party sizes] from the first sketch. Movable pieces such as bookcases on casters can create separate zones without traditional walls ([rd+d]).
Flooring follows the same zone logic: wet,high-traffic areas need different materials than the dining floor. See our guide to [restaurant flooring options by zone].
Small restaurant layouts
A small room punishes vague planning. The practical answer is to remove everything that does only one job.
- Use banquettes along walls. They maximize space, and in small dining rooms they are often paired with round tables that create flow and open-back chairs that make the room look more open ([Architectural Digest]).
- Add a mirror. A mirror can create additional space, and colour and material choices can build character and a recognisable brand ([Architonic]).
- Keep the pass short. In a compact plan, a long walk between kitchen and table costs more than a table you gave up.
- Hold the aisle minimum. Never trade the 36-inch main aisle for another table.
- Lean into intimacy. Small rooms can foster closeness and a respectful atmosphere ([Eater]), so design for it with lighting and material warmth rather than apologizing for size.
In practice, a good small plan has fewer, better-placed tables, one strong focal point (the bar, the open kitchen or a feature wall) and storage hidden inside the furniture.
From plan to built room
A layout is only as good as the drawings that carry it to the contractor. The usual path is concept and preliminary plan, 3D visualization to test sight lines and mood, then technical drawings, then furniture and materials selection, then site follow-up. Skipping a stage usually moves the problem to the building site,where it costs more. Our notes on [construction drawings that cut rework]and the [restaurant design concept process] explain what each stage should deliver. For a sense of budget at each stage,see [what to budget for restaurant interior design].
Our perspective
A layout is the first thing a guest feels and the last thing they can explain. They will not say the aisle was 42 inches; they will say the evening felt rushed or felt easy.
We work only on hospitality and commercial interiors, and we treat the floor plan as part of the brand, not a drawing that comes before the design. The zones, the seating mix and the sight lines are decided together with the concept, so the room reads as one idea from the entrance to the pass.
That is why we take a project from concept through visualization and execution drawings to furniture, materials and supplier follow-up. When the same team holds the plan from first sketch to site, the decisions made on paper survive the build.
slava
How we can help with your layout
If you are planning a new restaurant, a hotel dining room or a commercial food area, our studio covers the full path:[preliminary design] to set the zones and the concept,[3D interior visualization] to test the room before it is built,[execution drawings] for the contractor, furniture,[materials and accessories] selection,and [site and supplier follow-up]. Browse our [services],or see how we handled layout in projects such as [EG LACAL-A in Vienna]and [Nipper Bar].
FAQ
What is the best ratio of dining area to kitchen?
A common starting guideline is about 60% dining and 40% kitchen and storage ([Vitro Seating]). Adjust it for your menu, a show kitchen or a large bar. Confirm the final split on a scaled plan.
How wide should aisles be in a restaurant?
US main traffic aisles must be at least 36 inches wide under the 2010 ADA Standards ([Superior Seating]). Full-service rooms usually plan around 60 inches between table backs to leave service clearance. Local building and fire codes may require more.
How much space do I need per guest?
A general guideline for restaurants with a general menu is about 12 square feet per person, and banquet seating can drop to 10 ([Vitro Seating]). Slower, upscale concepts usually allow more. Use the figure to estimate seats, then test the plan.
How do I make a small restaurant feel bigger?
Use banquettes along the walls, a mirror, round tables where flow is tight and open-back chairs ([Architectural Digest]). Keep aisles clear and the kitchen pass short.
Sources
- [Restaurant Layout and Floor Plan Guide]
- How to Design a Restaurant Floor Plan,[Lightspeed]
- Restaurant Traffic Flow Planning Guide,[FoH Furniture]
- Seven Best Practices in Restaurant Space Planning,[rd+d]
- How to Maximize a Restaurant's Footprint,[rd+d]
- Tips for designing your restaurant floor plan,[Clover]
- Seating Guidelines,[Vitro Seating]
- Restaurant Seating Layout and Dimensions Guide,[Superior Seating]
- How far apart should I space my restaurant tables?,[Harrows]
- 17 Small Dining Room Ideas,[Architectural Digest]
- Small spaces, big impact,[Architonic]
- How Restaurants Offer Full Experiences in Seriously Tiny Spaces,[Eater]