Hotel Corridor Design: 4 Choices That Serve Guests and Owners
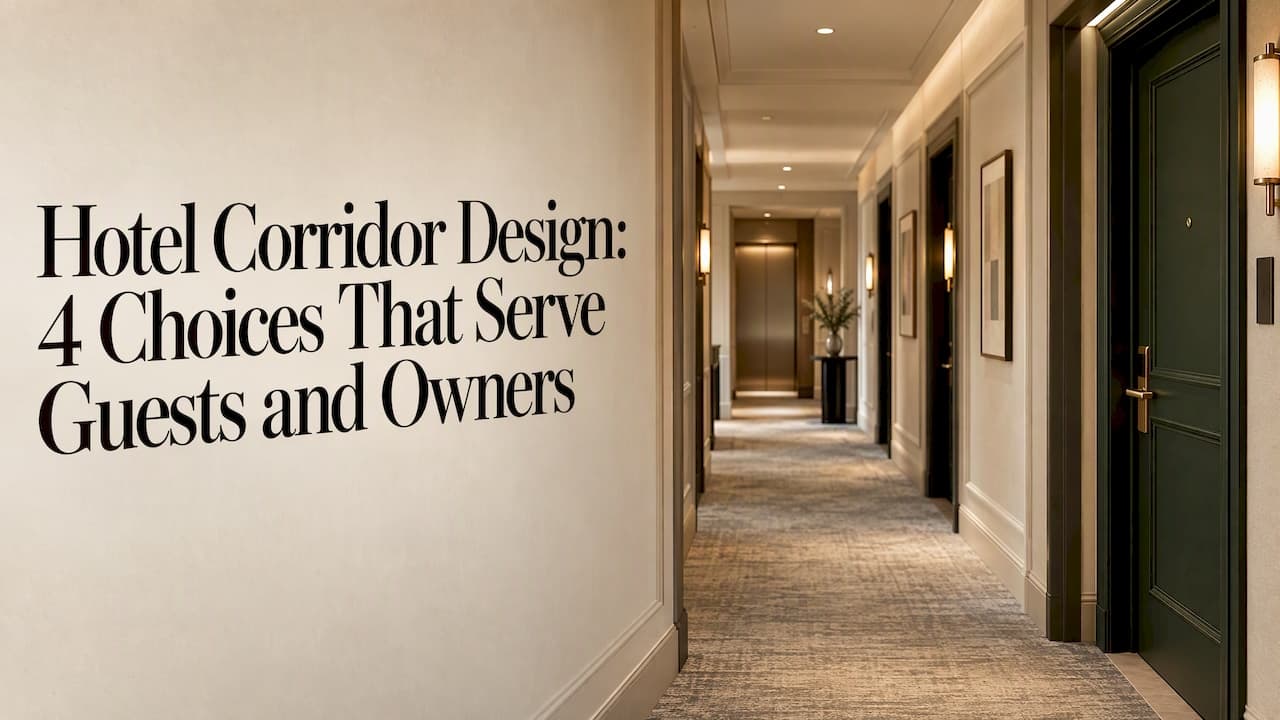
An effective hotel corridor balances safe wayfinding with atmospheric, brand-led lighting and materials. The four levers that decide whether a hallway feels like a dead end or an extension of the lobby are lighting, flooring and materials, wall and door finishes, and wayfinding. Below we walk through each lever with a practical checklist and a look at how we have applied them in real projects.
TL;DR:
- Keep egress and emergency lighting on a code compliant circuit independent of dimming scenes; schedule only accent lights to change with time of day.
- Use carpet tile when sound absorption matters and damaged sections need replacement; choose resilient flooring for heavier luggage traffic, then test samples with actual carts.
- Break long runs with recessed niches, ceiling changes, or alternating wall and ceiling fixtures, then align floor patterns so guests follow one consistent visual rhythm.
- Place high contrast signs at intersections and elevator lobbies, not along straight runs, and pair them with raised numerals and consistent door number placement.
- Budget properties should concentrate spending on lighting quality, durable flooring, and clear wayfinding, while luxury projects can support bespoke millwork and layered lighting.
Table of Contents
- Core design principles for hotel corridors
- Lighting strategies that combine safety, codes, and atmosphere
- Flooring and materials: carpets, runners, and resilient surfaces
- Walls, doors, and finishes: creating cohesion and contrast
- Wayfinding and signage: orient guests subtly and reliably
- Safety, accessibility, and building code considerations
- Styling and finishing touches: art, fittings, and scent
- BOOM Project case study: corridors we designed and the rationale
- Practical implementation checklist and spec sheet starters
- Integration of HVAC and ventilation elements within corridor design
- Innovative technology applications in corridor design
- Design adaptations for different types of hotel segments
- A corridor is a brand moment, not a hallway
- How BOOM Project supports your corridor project from brief to installation
- FAQ
- Sources
Core design principles for hotel corridors
A corridor is not a connector, it is part of the guest journey. The walk from elevator to room sets expectations before a guest ever touches the door handle, and a poorly scaled hallway can undo the impression a beautiful lobby has just created.
Proportion matters more than most owners expect. A corridor that feels narrow and tall reads as a tunnel, while one that is too wide and flat loses intimacy. As a working rule, ceiling height, width, and the length of any uninterrupted run should stay in balance: the longer the corridor, the more it needs visual breaks to keep guests from feeling like they are walking through a tube.
Breaking up long runs is the single most effective fix for the tunnel sensation. This can mean recessed niches every so many doors, a change in ceiling treatment, a shift in wall color, or a lighting rhythm that creates a sense of arrival at intervals rather than one flat corridor of light.
A few principles guide most successful layouts:
- Keep sightlines short enough that guests can see a landmark, not just an endless line of doors.
- Vary ceiling height or soffit depth at intervals to break monotony without adding clutter.
- Use color or material shifts at turns and intersections to help guests register a change in direction.
- Treat the corridor as a continuation of the brand story, not a utility space between public rooms and guest rooms.
These principles apply whether the property is a boutique hotel with a handful of rooms per floor or a large-scale commercial hospitality project with long double-loaded corridors.
Lighting strategies that combine safety, codes, and atmosphere
Lighting does more work in a hotel corridor than any other single element. It needs to meet safety requirements, support orientation, and still feel warm enough that guests do not feel like they are walking through an office building.
Three lighting layers typically coexist in a well-designed corridor. Egress and emergency lighting exists purely for safety and must stay on regardless of mood settings. Wayfinding lighting, often a continuous wash or a rhythmic sequence of fixtures, helps guests register direction and distance. Accent lighting, usually warmer and lower in intensity, adds the atmosphere that separates a forgettable hallway from a memorable one.
Corridor lighting is a key interior detail guests commonly notice, influencing their sense of a hotel's quality and safety before they reach their room,as noted in the [Design Guide for Hotel Lighting] published by the IES. That guide also lays out recommended illuminance targets and lighting design criteria specific to hotel corridors and public areas, alongside guidance on glare control through BUG ratings and energy management through daylighting and controls.
Rather than running a single flat row of downlights, we recommend a few tested fixture strategies:
- Alternate recessed ceiling fixtures with wall-mounted luminaires to create a repeating rhythm rather than a flat wash.
- Use warmer color temperatures in guest-facing corridors and reserve cooler, brighter light for back-of-house and service zones.
- Dim accent lighting on a schedule tied to time of day, while keeping egress lighting at full, code-compliant output at all times.
- Avoid pooling light only at door numbers; spread illumination evenly enough that no stretch of corridor reads as dark relative to its neighbors.
Combining functional light with warmer,atmospheric illumination and a deliberate lighting rhythm reduces what the [Wever & Ducré guide to corridor lighting] calls the tunnel effect, helping guests orient themselves without relying on heavy signage.
Flooring and materials: carpets, runners, and resilient surfaces
Floor choice affects acoustics, perceived length, durability, and housekeeping workload all at once, which is why it deserves more thought than color matching to the lobby.
Carpet remains the default in most mid-scale and upscale corridors because it absorbs sound and feels warm underfoot, though it requires a maintenance schedule to manage wear in high-traffic zones. Modular carpet tile offers a practical alternative: damaged sections can be replaced individually rather than requiring a full re-carpet. Resilient flooring such as luxury vinyl tile holds up better against rolling luggage and housekeeping trolleys, and ceramic or stone tile suits transitional zones near elevators or service areas where moisture or heavy wear is a concern.
Pattern and color do real work beyond decoration. A patterned carpet or runner laid along the direction of travel can shorten the perceived length of a long corridor and give guests a visual cue to follow toward their room, particularly when it is coordinated with the lighting rhythm overhead. Busy, directional patterns tend to read as dynamic, while small-scale, low-contrast patterns are better at disguising wear between cleanings.
A few practical points to weigh before finalizing a flooring spec:
- Test samples with the housekeeping cart or luggage trolley actually used on-site, since bumper height and floor transitions that look fine on paper can fail in daily use.
- Choose darker, textured patterns near service entries and lighter tones near guest rooms to balance durability against warmth.
- Specify a wear layer thickness appropriate to traffic volume rather than defaulting to a standard residential-grade product.
- Plan transition strips carefully at elevator lobbies, where wheeled luggage crosses material changes most often.
Walls, doors, and finishes: creating cohesion and contrast
Wall and door treatments carry most of the brand identity in a corridor, since there is rarely space for large furniture or statement pieces along the route.
Paneling, wainscot, and timber accents give a corridor texture without requiring elaborate millwork across every linear foot. A painted upper wall paired with a textured or paneled lower section also solves a practical problem: it puts durable material where carts and luggage are most likely to make contact, while keeping a softer finish above eye level.
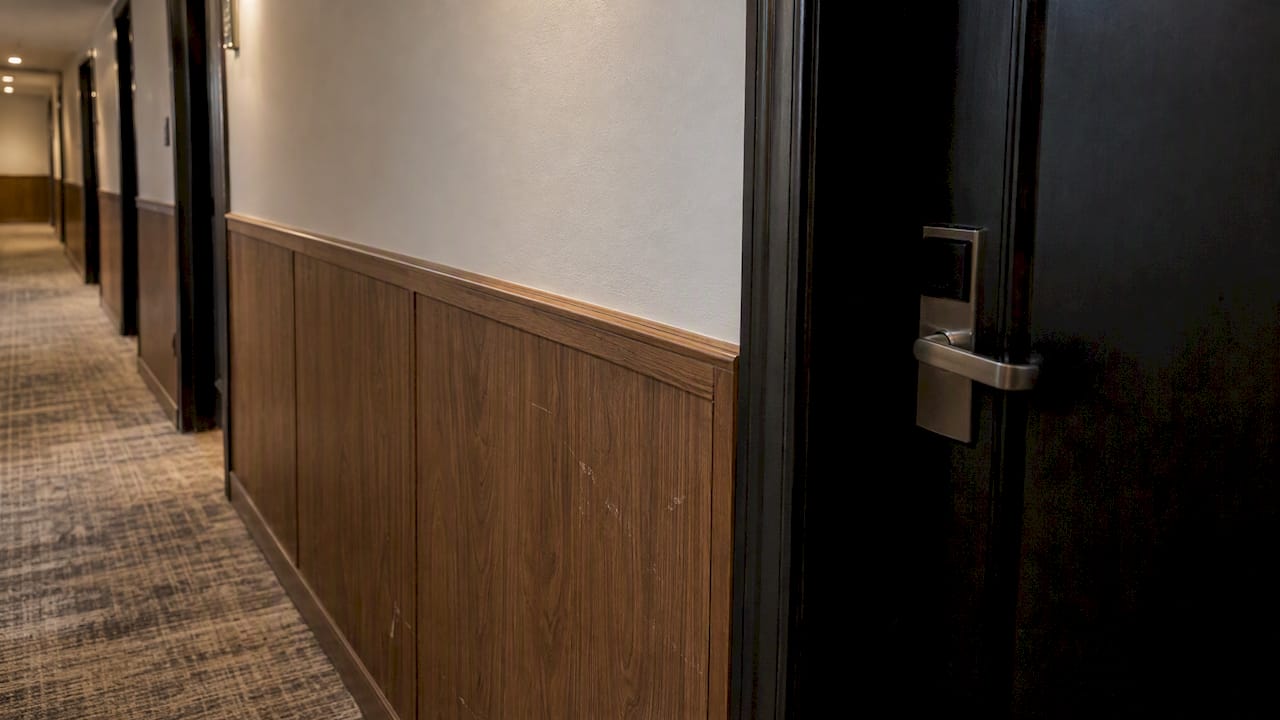
Door finish and numbering are wayfinding tools as much as they are decorative choices. A door frame finished in a contrasting tone from the corridor wall helps guests locate their room number faster, especially in dim lighting, and consistent numbering placement (always at eye height, always on the same side of the frame) removes a small but real source of guest frustration.
Durability should be built into the finish palette rather than bolted on afterward. A few approaches worth specifying:
- Integrate a protective rail or bumper at cart height into the wall design rather than adding a visibly utilitarian strip after installation.
- Use washable, scuff-resistant paint or wallcovering in the lower third of the wall, reserving delicate finishes for areas above contact height.
- Choose door and frame materials that can be spot-repaired without refinishing the entire unit.
- Keep wall texture simple enough that artwork and signage remain legible against it rather than competing with it.
Wayfinding and signage: orient guests subtly and reliably
Good wayfinding feels invisible. Guests should find their room without consciously reading a sign at every turn, which means lighting, flooring, and signage all need to point the same direction.
- Repeat lighting intervals and floor pattern shifts at predictable spacing so guests register rhythm rather than searching for individual cues.
- Place signage at decision points only, such as corridor intersections or elevator lobbies, rather than scattering it along straight runs where it adds clutter.
- Use clear, high-contrast typography and simple pictograms sized for the viewing distance of a walking guest, not a seated one.
- Add tactile and contrast cues, such as raised numerals and color differentiation at thresholds, so wayfinding also works for guests with low vision.
- Confirm every repeated cue, whether a lighting fixture, a floor pattern break, or a wall color shift, points toward the same decision point rather than introducing a conflicting signal.
Safety, accessibility, and building code considerations
Code compliance is not optional, but it does not have to look institutional. The IES design guide sets recommended illuminance targets for hotel corridors along with emergency lighting criteria, and treating those numbers as a design starting point rather than an afterthought avoids costly rework later in the IES hotel lighting guide.
Emergency and egress lighting must remain functional independent of any mood or dimming scene, a requirement the IES guide treats as a baseline rather than an optional layer.
A short list of constraints worth confirming early in design:
- Maintain clear width and headroom per applicable accessibility codes, with no wall-mounted fixtures or decor protruding into the path of travel.
- Specify low-glare fixtures, particularly near eye level, to avoid discomfort for guests walking the full length of a corridor.
- Mark thresholds, especially at elevator lobbies and stairwells, with clear contrast so transitions are visible even in dim conditions.
- Confirm emergency lighting circuits are separate from decorative dimming systems so a scene change never compromises egress illumination.
Styling and finishing touches: art, fittings, and scent
The details that make a corridor memorable are usually small. Artwork, fittings, and even scent do more to signal brand character than most structural choices, provided they are scaled for a moving viewer rather than someone standing still.
Artwork in a corridor is seen in passing, so scale and placement matter more than intricacy. Larger, simpler pieces read better at walking speed than a dense gallery wall, and secure, flush mounting prevents both damage and liability concerns in a high-traffic space.
Service alcoves for ice machines, linen storage, or housekeeping carts need enough clearance that they never interrupt the guest path, and they work best when visually set back or screened rather than left as an open utility nook. Small furniture, like a console table at a turn, should be placed where it cannot narrow the clear width below code minimums.
Texture and scent finish the sensory picture. A consistent signature scent, paired with tactile materials like a woven wallcovering or a textured runner, reinforces brand identity in a way that guests often remember without being able to name why.
- Mount artwork flush or recessed to avoid protrusions into the path of travel.
- Scale wall art and fittings for a 5 to 6 foot viewing distance at walking speed.
- Screen or recess service alcoves so housekeeping access never narrows the guest path.
- Select one signature scent and apply it consistently rather than layering competing fragrances by floor.
Pro Tip: Test wall-mounted decor and fittings with a loaded housekeeping cart before final installation to confirm nothing narrows the path below code.
BOOM Project case study: corridors we designed and the rationale
Corridor work rarely stands alone. It is part of a broader interior scope, which is why we treat hallway design as an extension of the same brand logic applied to lobbies and guest rooms.
At [Zatoka Family Hotel], corridor interventions focused on warm,family-friendly material choices paired with a simple wayfinding rhythm suited to a leisure property where guests of all ages move through the halls at different paces. At [Queen Odesa], the approach leaned into a more layered material palette and lighting sequence that echoes the restaurant and public spaces developed for the same brand, carrying the identity from arrival through to the guest room door.
In both cases, the process moved through the same stages: a preliminary design phase to set the material and lighting direction, 3D visualization so stakeholders could review lighting rhythm and finishes before committing to procurement, and execution drawings to carry the scheme into construction.
- Preliminary design establishes the corridor's lighting rhythm, material palette, and wayfinding logic before documentation begins.
- 3D visualization lets owners and operators review how a corridor will feel in motion, not just in plan.
- Execution drawings and procurement support carry the approved concept through to installed fixtures and finishes.
Practical implementation checklist and spec sheet starters
Briefing a corridor project goes more smoothly when the sequence is set before the first sketch. The following order works for most hotel renovation or new-build projects.
- Define the brand story and guest journey the corridor needs to support before selecting any finish.
- Set illuminance targets, color temperature, and CRI for each lighting layer, referencing the IES guide's recommended ranges for corridors.
- Specify flooring wear layer, IP and IK ratings for fixtures in wet or high-impact zones, and a realistic maintenance schedule.
- Test wall protection, bumper height, and floor transitions against the actual trolleys and carts used on-site.
- Bring operations and facility management into the review at concept and documentation stages, not just at handover.
- Finalize execution drawings and procurement lists before tendering to contractors and suppliers.
Pro Tip: Involve your facility manager at the spec stage, not after installation. A trolley that does not fit a corner costs far more to fix once walls are finished.
Integration of HVAC and ventilation elements within corridor design
Mechanical systems are easy to overlook until a grille ends up in the middle of a feature ceiling. Corridors often carry the bulk of a floor's HVAC distribution, so coordinating duct runs, diffusers, and return air paths with the lighting and ceiling plan early avoids visual clutter later.
Ceiling-mounted diffusers and sprinkler heads should be laid out in the same planning pass as light fixtures, so the ceiling reads as a considered composition rather than a patchwork of mechanical penetrations. Where ceiling height allows, recessed linear diffusers integrated into a soffit or cove detail disappear into the architecture far more effectively than surface-mounted grilles.
Ventilation also affects comfort in ways guests rarely notice consciously. A corridor that is too warm or carries kitchen or housekeeping odors from adjacent service areas undermines even the best lighting and material choices, so return air paths and pressure relationships between guest corridors and back-of-house zones deserve attention during mechanical coordination, not just finish selection.
Noise from HVAC equipment is a related concern. Duct silencers and careful routing away from guest room walls help keep corridors acoustically calm, which matters as much as the carpet choice discussed earlier when it comes to a guest's sense of quiet and privacy near their door.
Innovative technology applications in corridor design
Smart controls have moved from novelty to practical tool in corridor lighting. Sensor-based dimming, which brightens a lighting zone as a guest approaches and lets it fall back to a lower atmospheric level once they pass, cuts energy use while keeping egress lighting at compliant levels around the clock.
Daylight and occupancy sensors paired with scheduled dimming scenes let a corridor shift automatically from a brighter, functional mode during turnover hours to a warmer, lower mode overnight, without staff needing to adjust anything manually. This kind of control strategy is specifically called out in the IES guide's emphasis on energy management and controls as part of a modern lighting design approach.
Beyond lighting, some properties are integrating simple wayfinding technology, such as digital directories at elevator lobbies or subtle LED cues embedded in flooring or baseboards that indicate direction during low-light hours. These additions work best when they support the same rhythm already established by fixed lighting and floor pattern rather than introducing a separate, competing system of cues.
Design adaptations for different types of hotel segments
Luxury and budget properties both need safe, well-lit corridors, but the material and detail budget shifts significantly between them. A luxury property can justify bespoke millwork, layered lighting scenes, and curated artwork along every corridor run, where the goal is a continuous brand experience from lobby to guest room door.
A budget or select-service property gets more value from a smaller number of well-executed moves: a strong lighting rhythm, durable and easy-to-maintain flooring, and clear, simple wayfinding, rather than an abundance of decorative detail. Spending concentrated on lighting quality and material durability tends to return more guest-perceived value per dollar than spreading a modest budget thin across many finish types.
Mid-scale and extended-stay properties often sit between these approaches, prioritizing acoustic comfort and wear-resistant materials given longer guest stays and heavier luggage traffic, while still allocating a defined budget to one or two signature design moments, such as a feature lighting sequence or an accent wall treatment, that give the corridor a sense of brand identity without the full scope of a luxury build-out.
A corridor is a brand moment, not a hallway
The industry habit of treating corridors as leftover space between the "real" rooms is a mistake that shows up in nearly every hotel renovation brief we see. A guest spends more cumulative time walking hotel corridors over a stay than most owners budget for in the design phase, and that time either reinforces the brand or quietly undermines it.
The practical test is simple: walk the corridor pushing a loaded housekeeping cart, at night, with the accent lighting on. If the lighting rhythm, floor pattern, and clearances still work under those conditions, the design will hold up for guests too.
— slava
How BOOM Project supports your corridor project from brief to installation
We work through stages for a corridor project including preliminary design to set the brand direction and lighting logic, 3D visualization to review the finished rhythm before committing budget, execution drawings for tendering, and furniture and materials selection carried through to site and supplier follow-up.
- [Preliminary Design] sets the lighting, material, and wayfinding direction before documentation begins.
- [3D Interior Visualization] lets you review corridor lighting and finishes in context before procurement.
- [Execution Drawings]and [Site & Supplier Follow-Up] carry the approved scheme through construction and installation.
If you have a corridor project in mind,share your brief with our [services team] and we will walk you through which stage fits where you are today.
FAQ
What illuminance level is recommended for hotel corridors?
The IES Design Guide for Hotel Lighting provides recommended maintained illuminance tables specific to hotel corridors and public areas, which should be treated as the baseline reference during design. A qualified lighting designer can apply the exact target for a given corridor type and traffic level from those tables.
How do you reduce the tunnel effect in a long hotel hallway?
Breaking a long corridor with lighting rhythm, ceiling height changes, or alternating recessed and wall-mounted fixtures helps guests perceive distance differently, as outlined in the Wever & Ducré corridor lighting guide. Pairing that lighting rhythm with a directional floor pattern reinforces the same effect.
What flooring works best in high-traffic hotel corridors?
Modular carpet tile and resilient flooring such as luxury vinyl tile tend to hold up well against rolling luggage and housekeeping carts while remaining easy to repair in sections. The right choice depends on traffic volume, acoustic needs, and the maintenance schedule a property can realistically support.
How can hotel owners brief a corridor redesign effectively?
A clear brief should define the brand story for the corridor, target illuminance and material specifications,and accessibility requirements before any concept work begins. Our [preliminary design] service is built to translate that kind of brief into a concrete lighting, material, and wayfinding direction.